
| Getting Started |
|
1
|
After logging in, you can open your family tree in two ways:
|
|
2
|
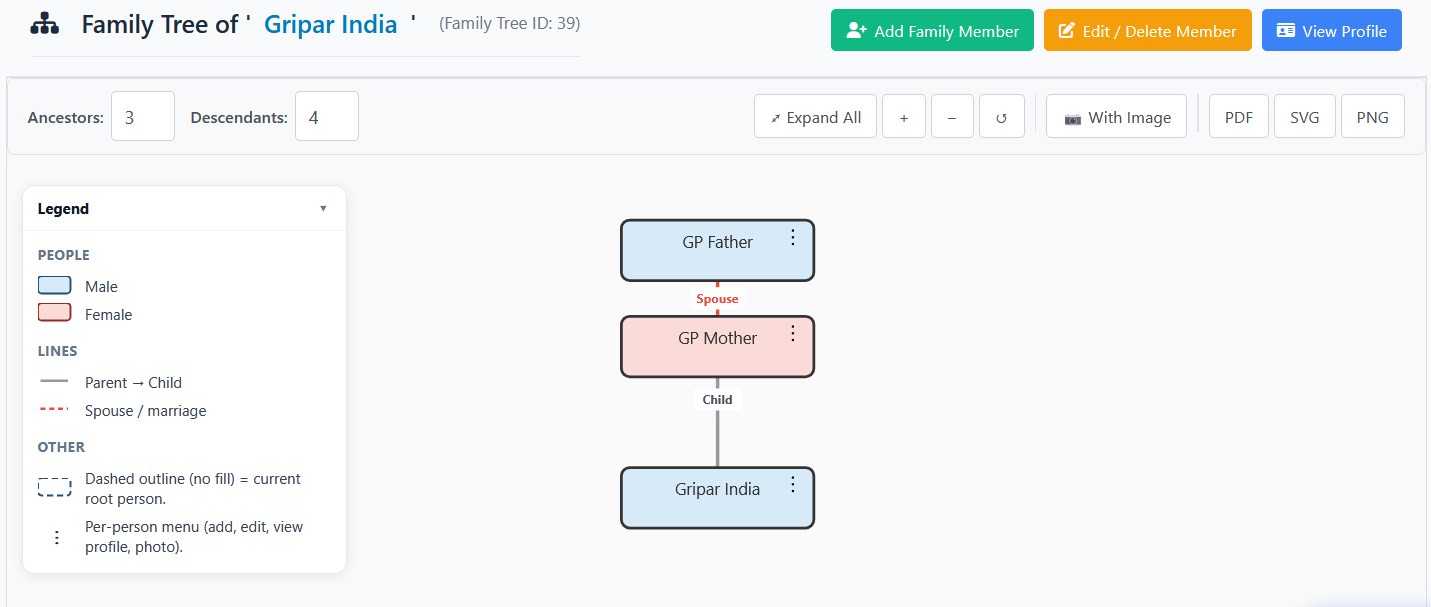
The tree opens with your name as the root node. As you add members it grows. Here’s how a sample Gripar family tree looks:
Suman Devi
⋮
Child
Ramesh
⋮
Sunita
⋮
Spouse
Child
Rahul 👈 You
⋮
Priya
⋮
Spouse
Child
Arjun
⋮
Son
Meera
⋮
Daughter
Karan
⋮
Son
Female
Male
- - - Spouse
— Child
💡 Tip: Click the ⋮ three-dot menu on any node to add members, edit details, or upload a photo.
 |
|
3
|
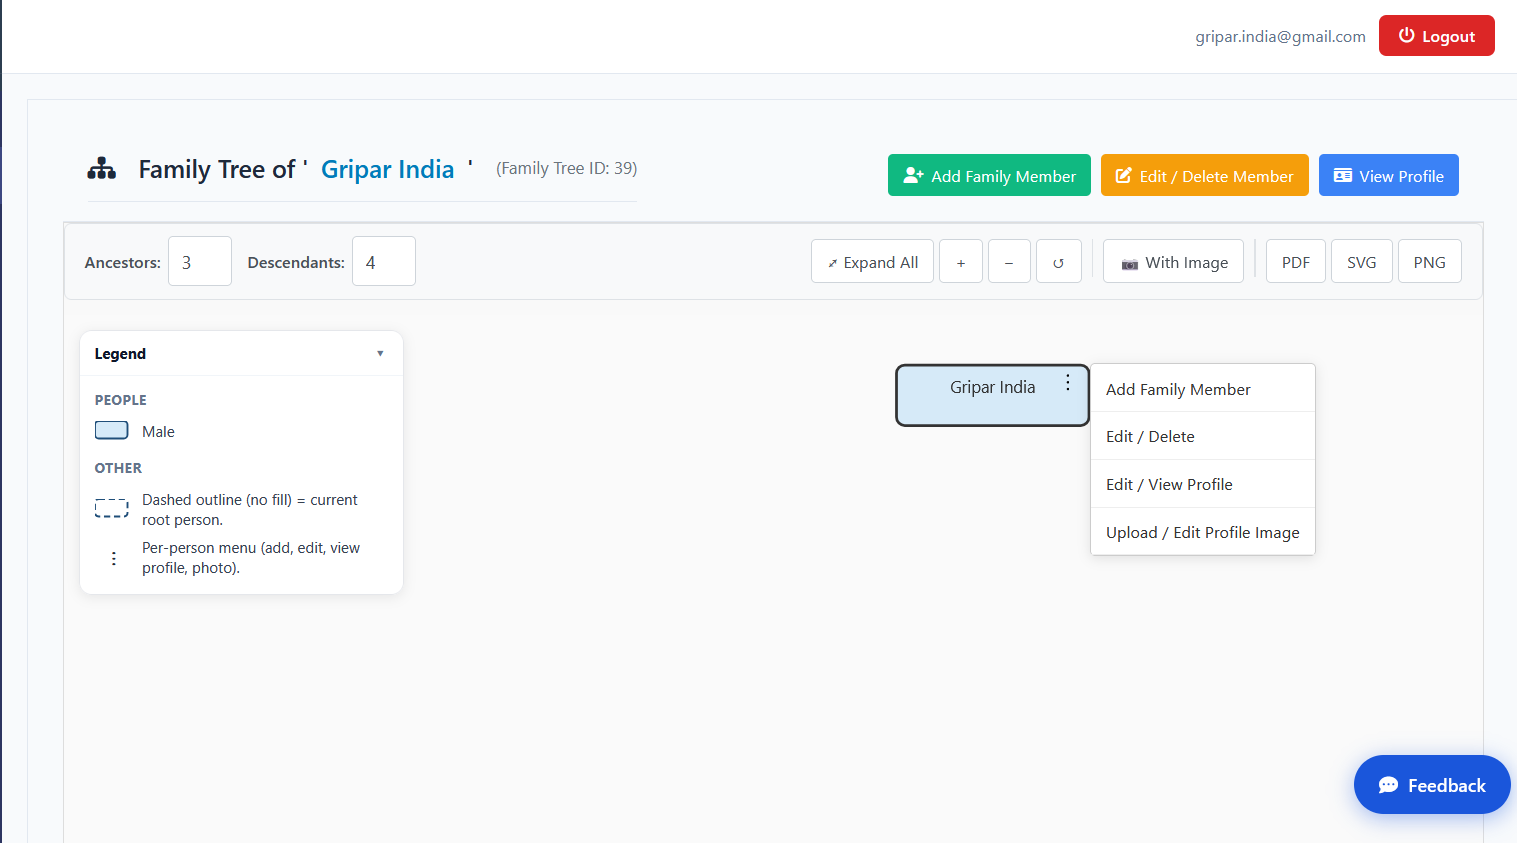
Each node has a three-dot (⋮) menu with these actions:
|
| Adding Family Members |
|
4
|
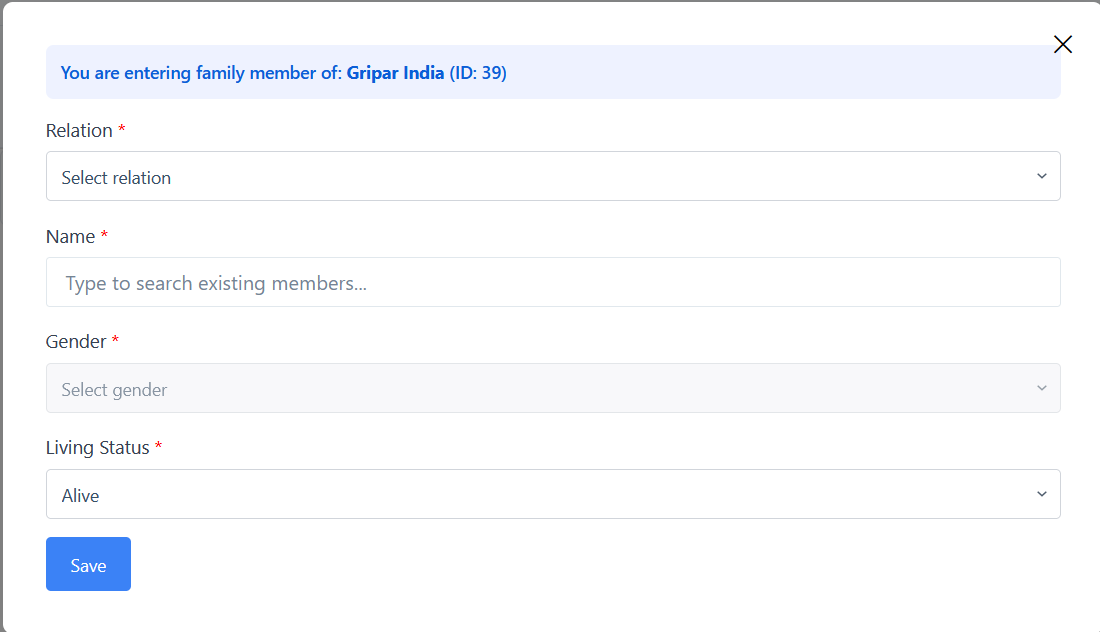
Click Add Family Member from the three-dot menu to open the modal. Choose their relation to the selected node — Gripar supports 7 relation types:
👴 Father
👵 Mother
👫 Spouse
👦 Son
👧 Daughter
🧑 Brother
👩 Sister
|
|
5
|
Fill in the following details for the new family member:
2.1 Name Search — New Member
After entering the name, the system searches for existing entries. If no match is found, it shows New Member — Will be added as fresh. 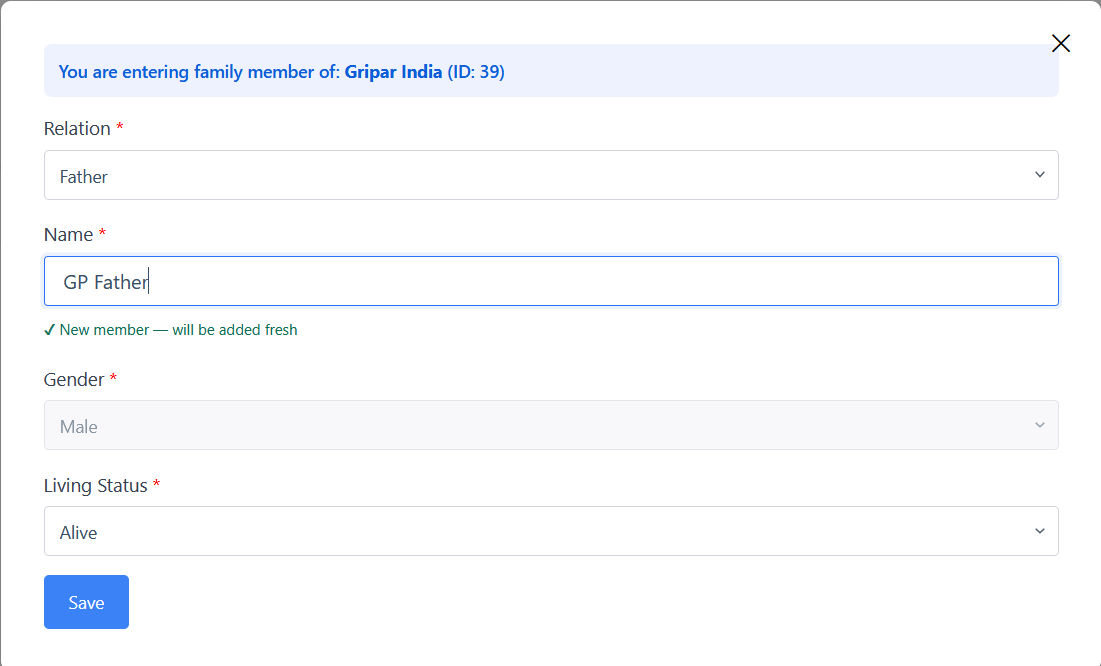 2.3 Name Match Found
If a matching name is found, click Review or press Enter to check if it’s the same person. 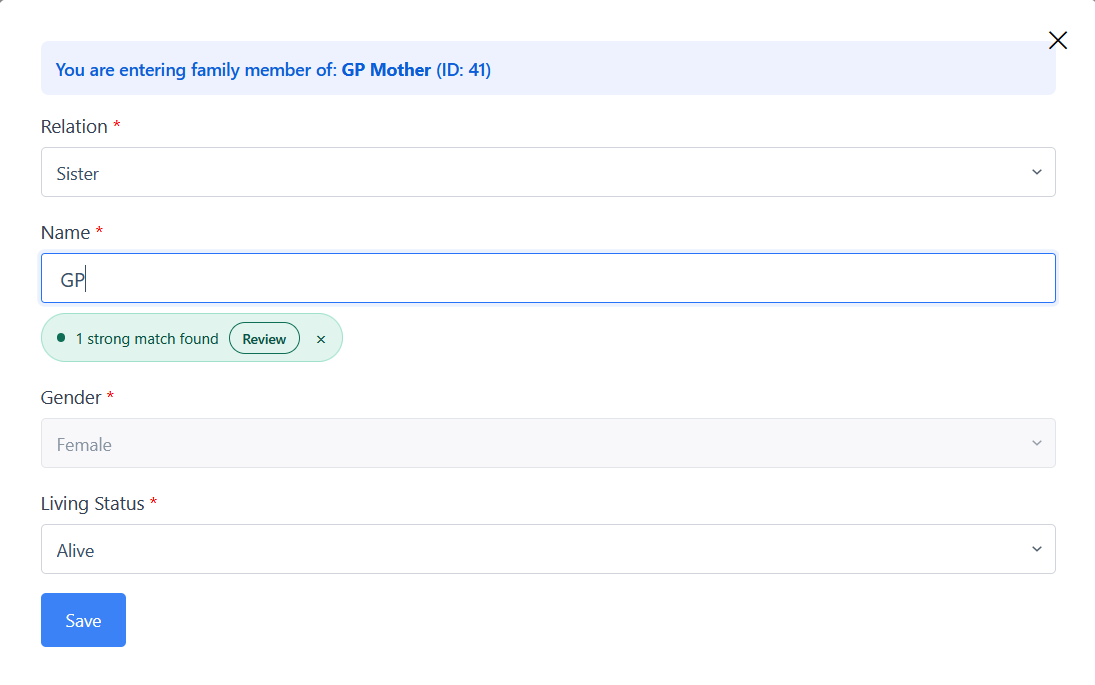 2.4 Records Match Window
A new window shows the matching record and the entry you made, side by side for comparison. 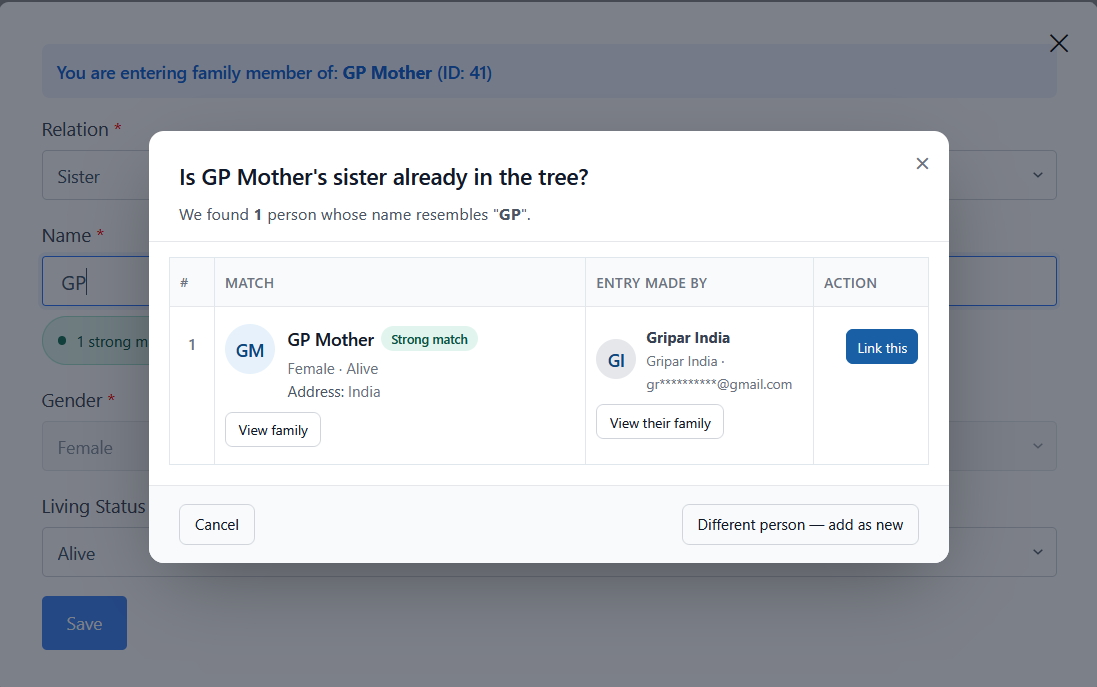 2.5 Link or Add as New Person
View the small family tree of the matching record. If it’s the same person, click Link This in the Action column. If not, click Different Person — Add as New. 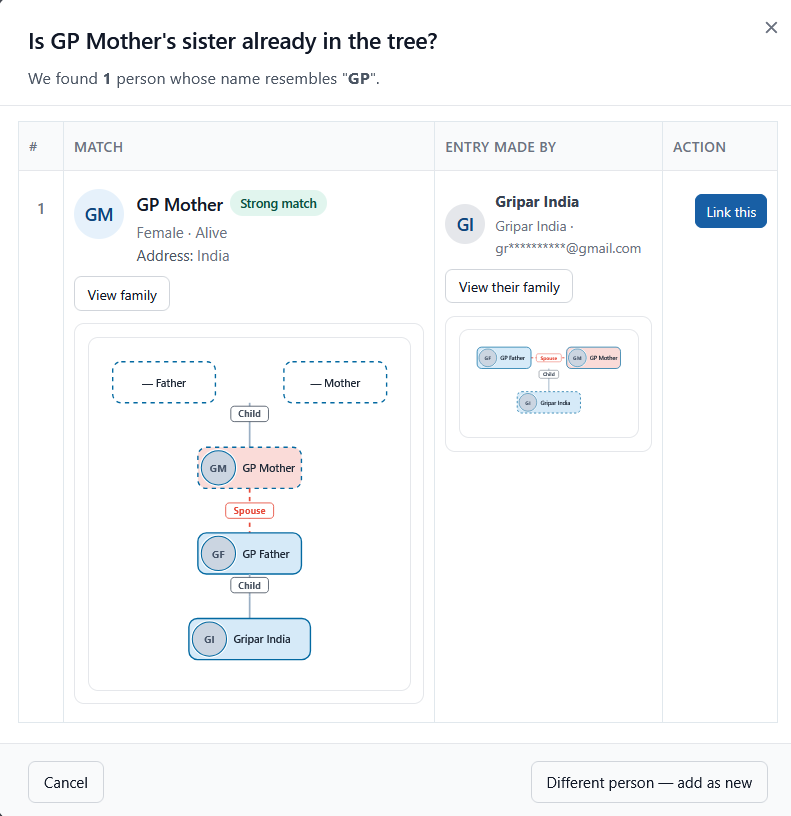 |
|
6
|
After saving, the family tree will automatically expand and branch out according to the relation you selected. Repeat for each family member to build your complete digital family tree!
 |
📋 Quick Reference — Node Menu Actions
🤝
Need Help?
Our support team is happy to help you build and manage your family tree.
Frequently Asked Questions
How many family members can I add?
There is no limit. You can add unlimited family members and build as large a tree as your family requires.
What relation types does Gripar support?
Gripar supports 7 relation types: Father, Mother, Spouse, Son, Daughter, Brother, and Sister. Each relation automatically places the new member in the correct position in the tree.
Can two Gripar accounts be linked if they represent the same person?
Yes. When adding a member by name, if a matching record is found, you will see a Link This option to connect the entries rather than create a duplicate.
Can I upload a photo for each family member?
Yes. Click the three-dot (⋮) menu on any node in the tree and choose Upload Photo to add or change a profile picture for that member.
What should I do if I accidentally delete a member?
Deleting a member removes them from the tree permanently. To avoid accidental loss, use the Edit option from the three-dot menu to update a record rather than deleting it. If you need to restore a member, please contact Gripar support.
General Questions
What is Gripar?
Gripar is a Digital Home & Family platform that helps families build a secure digital family tree, preserve memories and traditions, and stay connected regardless of distance — whether they live in the same house or different countries.
Is Gripar free to use?
Gripar offers a free plan so every family can get started. Sign up to explore the platform and begin building your family tree at no cost.
Is my family data secure on Gripar?
Yes. Gripar uses industry-standard security practices to protect your data. Your family information is private and accessible only to you and the members you invite.
Can family members in different countries use Gripar?
Absolutely. Gripar is designed for families spread across cities and countries. It provides a single trusted platform where everyone can contribute, connect, and share their heritage.
How do I contact Gripar support?
You can reach our support team via the Contact Us page on Gripar. We are happy to help with any questions.